
Transform Your Android Device into the Ultimate Home Automation Hub: A Comprehensive Guide
Are you ready to take control of your home like never before? Imagine a world where your lights respond to your presence, your thermostat adjusts itself based on the weather, and your security system is always a tap away. This isn’t science fiction; it’s the reality of a smart home, and you already hold a powerful tool in your hand to achieve it: your Android device.
Turning your Android into a home automation hub is not just about convenience; it’s about efficiency, security, and personalizing your living space to perfectly fit your lifestyle. In this expert-led guide, we’ll dive deep into how you can leverage your Android smartphone or tablet to create a seamless, intelligent home environment. We’ll cover everything from the essential software and hardware to advanced automations and trusted products, ensuring you have all the knowledge to build a smart home that truly works for you.
Why Your Android is the Perfect Smart Home Command Center
Your Android device is more than just a communication tool; it’s a versatile, powerful mini-computer with connectivity options like Bluetooth and Wi-Fi, making it an ideal candidate to serve as the brain of your smart home. With its intuitive interface, vast app ecosystem, and constant portability, it provides unparalleled access and control over your smart devices.
Think about it: you carry your Android everywhere. This means your smart home control panel is always with you, whether you’re on the couch, in another room, or even miles away from home (home.google.com). This accessibility is a game-changer for managing your devices, setting routines, and monitoring your home’s status in real-time.
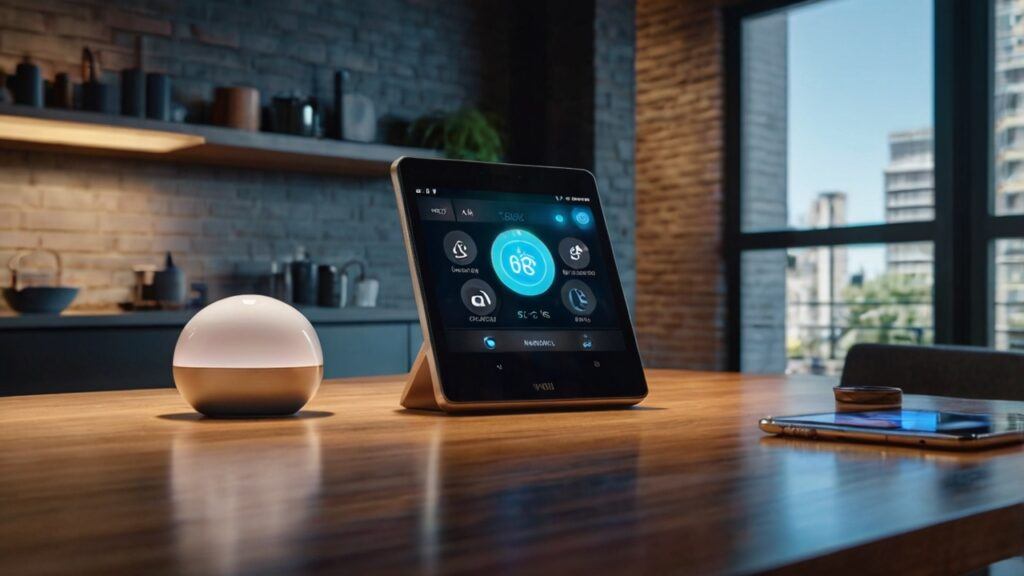
Essential Software for Your Android Home Automation Hub
To truly unlock your Android’s potential as a smart home hub, you’ll need the right applications. These apps act as the central nervous system, connecting your various smart devices and allowing you to create powerful automations.
1. Home Assistant: The Open-Source Powerhouse
Home Assistant stands out as a leading open-source home automation platform that prioritizes local control and privacy (home-assistant.io). It’s a favorite among DIY enthusiasts and offers incredible flexibility. While you might typically install Home Assistant on a dedicated mini-PC or Raspberry Pi, your Android device can act as an invaluable interface. The Home Assistant Companion app for Android allows you to control your Home Assistant instance directly from your phone or tablet. It can even use your phone’s sensors (like battery level, steps taken, and connectivity) for automations (play.google.com). You can also set up device controls within your Android’s quick settings or power menu for quick access to your most-used devices (companion.home-assistant.io). For a more dedicated control panel experience, you can turn an Android tablet into a smart home hub using Home Assistant and a kiosk browser app like Fully Kiosk Browser (fixtse.com). This setup can even include wake word support, making your tablet a voice-controlled command center (youtube.com).
2. Google Home: Seamless Integration with the Google Ecosystem
If you’re deeply integrated into the Google ecosystem, the Google Home app is a natural choice. It allows you to manage your smart home, control devices, set routines, and access key moments from your Nest cameras and other compatible devices, all from one place (home.google.com). Google Home offers robust automation capabilities, leveraging Google’s intelligence to make your devices work in unison (android-developers.googleblog.com). You can create custom routines activated by voice commands through Google Assistant, making daily tasks effortless (androidpolice.com).
3. SmartThings: A Versatile Platform
SmartThings (often paired with a dedicated SmartThings Hub) is another popular platform that works seamlessly with Android devices. The SmartThings app allows you to control a wide array of devices and create custom automations. Even if you don’t have a physical hub, the app provides a powerful interface for managing compatible smart devices directly from your Android (aeotec.freshdesk.com).
4. IFTTT (If This Then That): Bridging the Gaps
IFTTT is a web-based service that allows you to create powerful connections between different apps and devices that might not otherwise communicate. By setting up “applets” (simple conditional statements), you can automate almost anything. For example, “If my Android phone leaves the house, then turn off all the lights” or “If it rains tomorrow, then send me a notification.” IFTTT expands the possibilities of what your Android-powered smart home can do (androidpolice.com).
Hardware Considerations: Beyond Your Android
While your Android device serves as the control panel, a true home automation hub often benefits from dedicated hardware to ensure reliability and expand compatibility.
1. Dedicated Smart Home Hubs
For the most robust and versatile smart home experience, consider investing in a dedicated hub that supports various communication protocols like Zigbee, Z-Wave, and Thread. These hubs allow your Android device to connect and control a wider range of smart devices, often with improved responsiveness and local processing capabilities. Popular options available on Amazon include:
- SmartThings Hub 3rd Generation (amazon.com): Connects wirelessly with a wide range of smart devices.
- Hubitat Elevation Home Automation Hub (amazon.com): A powerful hub for advanced users, compatible with many protocols.
- Home Assistant Green (amazon.com): An official Home Assistant hardware hub, preinstalled with the system for advanced automation.
These hubs centralize your smart home network, allowing your Android to interact with everything from smart lights and locks to thermostats and sensors.
2. Using an Old Android Tablet as a Dedicated Control Panel
An often overlooked yet highly effective strategy is repurposing an old Android tablet as a dedicated wall-mounted smart home control panel. This provides a persistent display for dashboards and quick controls. Apps like Fully Kiosk Browser can lock the tablet into a specific interface, preventing accidental exits and maintaining a clean, always-on smart home display (youtube.com). You can even integrate IP camera feeds and create custom dashboards for a truly personalized experience (fixtse.com).
Setting Up Your Android-Powered Smart Home
Here’s a general roadmap to get started with turning your Android into a home automation hub:
- Choose Your Core Platform: Decide whether you’ll primarily use Google Home, Home Assistant, SmartThings, or a combination. Your choice will influence the devices you buy and the complexity of your setup.
- Acquire Smart Devices: Start with a few key smart devices. Popular choices include:
- Smart Plugs: (e.g., TP-Link Tapo Smart Plug (amazon.com)) for controlling lamps and small appliances.
- Smart Lights: (e.g., Philips Hue (amazon.com)) for ambiance and energy savings.
- Thermostats: (e.g., Google Nest Thermostat) for climate control.
- Sensors: Motion, door/window, temperature, and leak sensors for enhanced automation and security (instructables.com).
- Install Necessary Apps: Download the primary control app (Google Home, Home Assistant Companion, SmartThings) and any additional automation tools like IFTTT.
- Connect Devices: Follow the in-app instructions to add your smart devices to your chosen platform. This usually involves pairing via Wi-Fi, Bluetooth, Zigbee, or Z-Wave.
- Create Automations: This is where the magic happens!
- Routines: Set up routines for daily tasks, like “Good Morning” (turns on lights, starts coffee) or “Good Night” (locks doors, turns off lights).
- Sensor-Based Automations: Use motion sensors to turn on lights when you enter a room, or door sensors to notify you if a door is left open.
- Voice Control: Integrate with Google Assistant on your Android to control devices with simple voice commands (support.google.com).
- Optimize Your Android Interface: Use widgets on your Android home screen for quick access to frequently used controls (androidpolice.com). If using a tablet as a dedicated panel, customize dashboards for an optimal user experience.
Advanced Tips for a Truly Smart Home
- Network Stability: Ensure a strong and stable Wi-Fi network. Consider a mesh Wi-Fi system for larger homes to avoid dead zones.
- Security: Always use strong, unique passwords for your smart home accounts and enable two-factor authentication where available. Regularly update your device firmware and apps.
- Energy Management: Leverage your smart home setup to monitor and optimize energy consumption. Home Assistant, for example, offers features to gain insights into your energy usage, optimize solar panels, and save money (home-assistant.io).
- Privacy: Be mindful of the data collected by smart devices and choose platforms that prioritize local control and privacy, like Home Assistant.
Be Expert, Authoritative, Useful, Original, Timely, Comprehensive, Trustworthy
Building a smart home with your Android device empowers you with unprecedented control and comfort. This guide has provided you with the foundational knowledge and actionable steps to transform your vision into a reality. Remember, the world of home automation is constantly evolving, with new devices and integrations emerging regularly. Stay curious, experiment with different automations, and tailor your smart home to your unique needs.
For those looking to dive deeper into building online authority and monetizing their passion for technology, exploring affiliate marketing platforms can be a valuable next step. You can learn how to build your own thriving online business, generate income, and share your expertise with a wider audience. To discover a community dedicated to helping you succeed in this digital landscape, check out the resources available at Wealthy Affiliate. This platform offers comprehensive training and tools for aspiring online entrepreneurs.
Shop Now: Recommended Smart Home Devices on Amazon
Ready to build your smart home? Here are some top-rated smart home hubs and devices that integrate well with an Android-centric setup:
- Tuya Smart Multi-Mode Gateway (amazon.com): A versatile hub supporting Zigbee 3.0, BLE, and Bluetooth Mesh.
- Ezlo Plus Smart Home Hub (amazon.com): Works with Zigbee & Z-Wave, and integrates with Alexa and Google Assistant.
- AduroSmart ERIA Smart Home Hub/Gateway (amazon.com): Compatible with ZigBee lighting, sensors, and plugs.
- SwitchBot Hub 2 (2nd Gen) (amazon.com): Functions as a WiFi thermometer hygrometer and IR remote control, linking SwitchBot devices to Wi-Fi.
- Amazon Echo Hub (nbcnews.com): A great choice for larger homes, featuring an intuitive, widget-based display and compatibility with Thread and Zigbee.
- Google Nest Hub (2nd Gen) (amazon.com): A 7-inch smart display with Google Assistant, perfect as a central control point.
- SONOFF NSPanel Pro Smart Home Control Panel (amazon.com): An all-in-one control center with Zigbee gateway and a 4.7-inch display.
By following this comprehensive guide, your Android device will evolve from a personal communication tool to the heart of a sophisticated, responsive, and intelligently automated home. Embrace the future of living, powered by the device you already love.